Monitoreal Secure Guard Mobile App Guide
Thank you for downloading the Monitoreal Secure Guard app!
Welcome to the Monitoreal Secure Guard Mobile App Guide. In this guide, we’ll walk you through the seamless process of setting up the app, connecting your Monitoreal devices, and harnessing the full range of mobile app features. Whether you’re a new user or looking to optimize your experience, we’re here to ensure you make the most of our innovative security solutions. This guide refers to your Monitoreal Video Security Assistant as MR for short.
TABLE OF CONTENTS
1. Registration
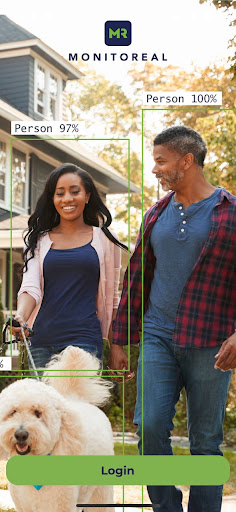
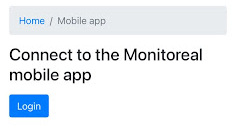
The Monitoreal app login screen
- Download the application and launch it for the first time. You will be presented with the login screen shown above.
- Click on the “Login” button to proceed. You will be redirected to the login page where you have the following options:
- Log in using your Monitoreal account details.
- Log in using your Google or Apple account (if available).
- If you don’t have an account, you can also choose to register a new account at this stage if you haven’t done so before.
2. Interface
2.1 Recent events
- After logging in, you will be directed straight to the “Recent events” page. This page displays a feed of all the events that have occurred on every device linked to your account.
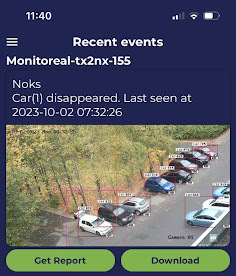
The Recent Events screen - Each event in the feed includes the following details:
- Device name at the top of the event.
- Camera name.
- Name of the object that triggered the event.
- Description of the event itself.
- Timestamp indicating the date and time of the event.
- An image of the event with objects highlighted in frames (based on preset rules explained in chapter 2.12).
- Depending on the event type (Appeared/Disappeared), you may also find the following buttons associated with each event:
- “Get Report” button: This allows you to view the report for the ‘Disappeared’ event directly within the app.
- “Download” button: You can use this button to download the event report to your device’s gallery in the form of a video.
- “Relay Actions” button: This button will only appear if you have the semi-automatic relay actions (as explained in chapter 2.7) enabled for the specific rule associated with this event. It allows you to select the action for the relay that will be triggered for this particular event.
2.2 Search for devices
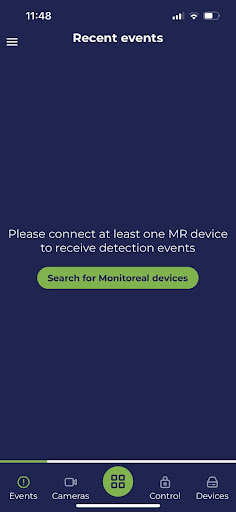
- If there are no devices added to your account yet, you will encounter a message indicating this situation.
- On the same screen, you will find the button labeled “Search for Monitoreal devices.”
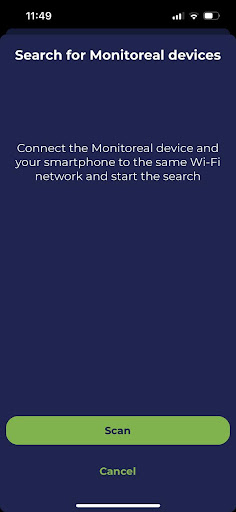
- Clicking on the “Search for Monitoreal devices” button will redirect you to a separate search page. This page provides instructions on how to locate and connect your appliances. You’ll also see two buttons: “Scan” and “Cancel.”
- To initiate the search for your appliances, click the “Scan” button. This action will enable you to view all the available appliances that can be connected to your mobile application.
- If, for any reason, you decide to cancel the search process, simply press the “Cancel” button. This action will close the search page and return you to the “Recent events” screen.
Searching for MR devices from the Recent Events screen
3. Connect MR devices
3.1 Connect a new MR device
- Following the above screen, press the “Scan” button and locate your device from the list.
- Click on your device, and a pop-up window will appear in your mobile’s web browser. You will be prompted to enter the credentials of your device.
- After completing these steps, you will encounter one of two scenarios:
- Scenario A: You will see a page with a blue ‘Login’ button that allows you to connect your phone or tablet with the appliance.
Connect your mobile or tablet with the selected appliance
- Scenario B: Alternatively, you may see a list of mobile sessions that were previously connected to this device. In this case, choose “Log out”. This will lead your web browser page to provide you with the option to connect your mobile device and appliance using the blue button, which must be selected.
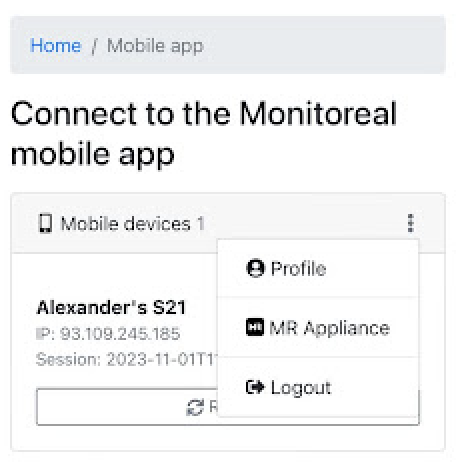

Logging out of the mobile session
- Scenario A: You will see a page with a blue ‘Login’ button that allows you to connect your phone or tablet with the appliance.
- After selecting the blue button, you will be required to enter your mobile app account details.
- A confirmation page will be displayed. You can close it and return to the mobile app.
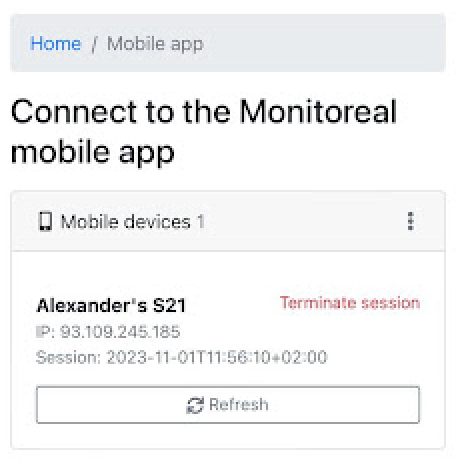
- Finish setting up the name of your newly-connected appliance. Click “Continue,” and you will now see your mobile session on the same screen.
Your successfully connected device and mobile session has begun
3.2 Connect an existing MR device, additional setup in Telegram
- Open Telegram and navigate to the bot that was configured for your Monitoreal device.
- Send the following command to the bot’s chat: “/mobile.”
- If you are using the default credentials on your Monitoreal device, you will need to change them to proceed.

Submitting the correct command to Telegram
- If you are using custom credentials, after sending the “/mobile” command to the bot’s chat, click on the “Sign in” option provided by Telegram’s bot.

Signing in via the option provided by the Telegram bot
- You will be directed to a “Sign in / Registration” page on your web browser.
- Enter your account credentials and click on “Sign in.” If you don’t have an account, click on “Register.”
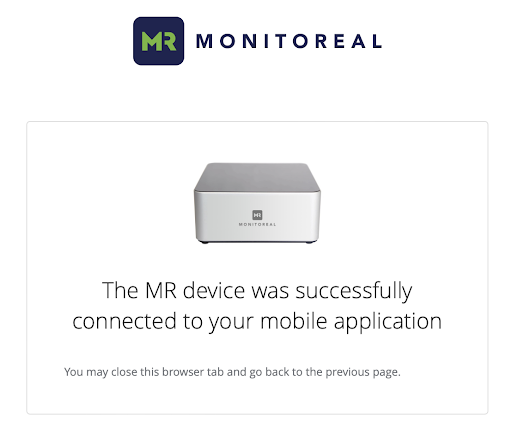
- Once you have successfully signed in, you will see the message: “The MR device was successfully connected to your mobile application.”
Successful sign in
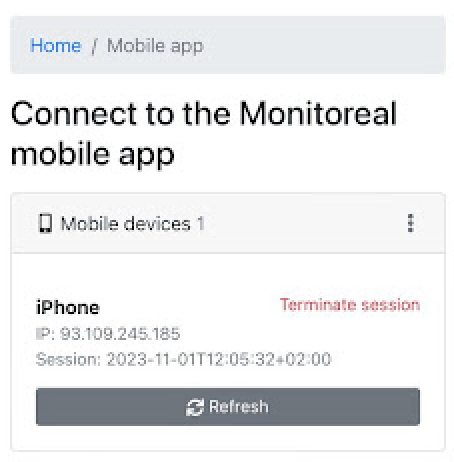
- For verification, go back to Telegram and send the “/mobile” command to your bot. You will see the session that was recently created.
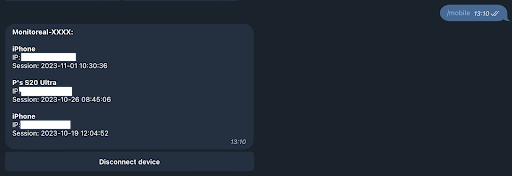
Evidence of the session created
3.3 Connect an existing MR device, additional setup in WUI
- Open a web browser and navigate to the device’s WUI (Web User Interface) using its IP address (e.g., 192.168.XX.X).
- Log in to the device using your credentials (e.g., Username: “smartview”, Password: “smartview”).
- On the device’s WUI, navigate to the “Settings -> Mobile” page.
- Click on “Login.”
- A login page will appear, where you can enter your credentials to either “Sign in” or “Register” if you don’t have an account.

Evidence of the session created
- Enter your credentials and click on “Sign in.”
- Once you have successfully signed in, you will see a message confirming that “The MR device was successfully connected to your mobile application.”
- Return to the device’s WUI. You can rename the Monitoreal device that has just been added to your mobile application and click “Continue.”

Rename the MR device in the WUI
- Your Monitoreal device has been successfully added to the Monitoreal Secure Guard application.
- Open the Monitoreal Secure Guard application and navigate to “Dashboard -> Devices.” You should now find the device registered in the list of your Monitoreal Devices.
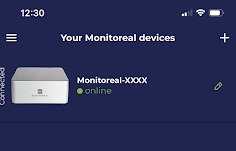
Your MR device listed in the app
4. Interface cont.
4.1 Burger menu and pages
The burger menu
By pressing the icon in the top left corner of the screen you will open the burger menu, which contains:
- Recent events
- Dashboard
- Profile
- Settings
4.2 Dashboard
In the Dashboard, you will initially see all the events from the particular appliance that is currently selected by you (if any).
The functionality and the buttons for each event are exactly the same as described in “Recent events” section.
At the bottom of the Dashboard page, you will see a separate panel with the following options:
- Events – the page you are currently on
- Cameras – gives you access to all of the cameras that are connected to the specific device which is currently selected
- Menu
- Control
- Devices
4.3 Profile
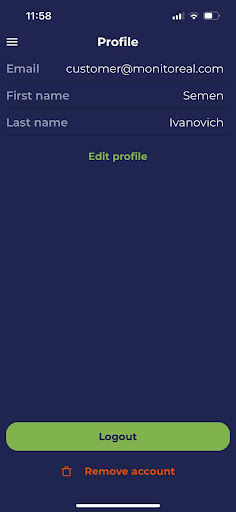
In the Profile section you will see your email address, name, surname, as well as several buttons as follows:
- Edit profile – redirects you to a separate web page where you can edit your profile
- Logout – logs you out of the application
- Remove account – removes your account from the database. Please be aware that this action can not be undone!
The app’s Profile section
4.4 Settings
The Settings menu allows you to change:
- The app theme: light or dark
- Language
- Check the User Terms and Processing of the Personal Data in the About section
- Change the notification settings with the “Keep all the notifications active” toggle. When this toggle is switched off, only the critical alerts (in case any device from your list went offline/online) will stay active, whilst other notifications such as detections will be switched off and will not be presented in either push notifications or the application.
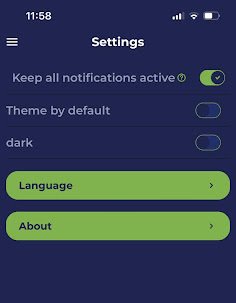
The app’s Settings section
4.5 Cameras and related actions
The Cameras button is available in the Dashboard section. The cameras section will present you with all the cameras that are connected to the device which is currently selected in the “Devices”.
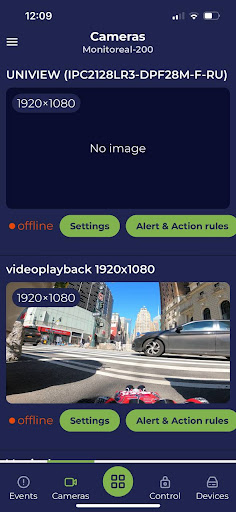
The app’s Cameras section
Each camera has:
- The preview image, which gets dynamically updated in case there is a detection. By pressing the preview image you will be able to get straight to the live view of this particular camera

The camera preview image
- Status: online (in green), offline (in red)
- Settings button – by pressing which you will get to the preview of the camera settings described in your start guide (in case you want to change some of the settings, you can press the cogwheel icon in the top right corner). It also contains the “Archive” button which will show you the detections archive of this particular camera, and the “Delete camera” button which will delete this particular camera from those connected to your appliance.
- Alert & Action rules – where you can see and set all the different rules for detection that you prefer to be active for this camera.
4.7 Control
In the Control part of the dashboard bottom menu, you can arm or disarm your appliance which is currently selected on the device list by simply swiping your screen in one direction or another.
4.8 Devices
On this page, you can see all the appliances that are currently connected to your account. It also contains:
- The device’s status – online (in green), offline (in red).
- The indicator of the device that is currently selected to be shown in the Dashboard which is shown on the left of such device in the form of the “Connected” sign.
- The “Edit/Pencil” button on the right of each of the available devices, allows you to customise your device’s name so that you wouldn’t mistake it with another one.
- The “+” button in the top right corner of the page allows you to perform a search for a new appliance in the local network.
4.9 Camera Settings
Within the camera settings section, you will find:
- Camera name – allows you to change the name of your camera.
- Capture source – the source that is being used to capture the image from live stream or snapshots (the snapshots are pictures).
- Motion threshold – The size of the moving object that triggers the system. In order for the system to react to smaller moving objects, decrease the threshold value. (Please be careful lowering the value below 30% when it is not really necessary, as it may overload the system and the object detection may also be delayed and become less accurate).
- Queue priority – Higher priority camera streams or snapshots get processed earlier than the ones captured from the lower priority ones.
- OD minimal accuracy – Minimal percentage accuracy of the objects that are getting detected. (F.i. if set to 30%, then the appliance will notify you of any objects set in the rules that match for at least 30%).
- OD alerts double-check – This is a double-check of a detected object. It is only used to eliminate false alerts and does not apply to images stored on the device.
- Alerts – sends the alerts to you.
- Error reports – sends the notifications about any errors with the camera to you.
4.10 Alert and action rules
You can add as many rules as you want for each camera. To create a new rule please press the “+” icon in the top right corner.
The “Speaker” icon lets you set up the sound and its source that will go off in case the set rule is triggered.
The “Relay” icon lets you set up one of the available relays that will go off in case the rule is triggered. It will require you to choose whether the relay action has to be:
- Automatic – goes off as soon as the rule is triggered
- Semi-automatic – sends you a notification with the relay actions button where you choose what exactly the relay has to do
The “Bin” button deletes the chosen rule from the list. Please note that this action can not be undone!
Each rule has the following settings:
- Object type to be detected.
- Density control – the minimal number of objects that are required for the rule to get activated (f.i. Is set to “person” and “density control – 3”, then you will get notified only when there are 3 people in the field of view.
- Start/End time – set the time when the rule has to be active.
- Days – set the days of the week when the rule has to be active. Works together with the Time.
- OD minimal accuracy – allows you to adjust the OD accuracy overwriting the general rule set in the camera settings for this specific detection rule.
- Loitering delay – this setting notifies you if the object of the rule stays in the camera’s field of view after the time period that is specified in this setting.
- Loitering reminder – Use this option when you want to be reminded that the object is within the camera view within the time period which you have specified (in seconds).
- Alert on object detection/disappearance – sends you notifications when the object from your rule has been detected/has disappeared.
- Profile – which group does this rule have to work in. (for instance, if you set it to Disarm, then this rule will stay active only when the device is disarmed).
The End